Get and Display Game Info
Preparation: create helping components
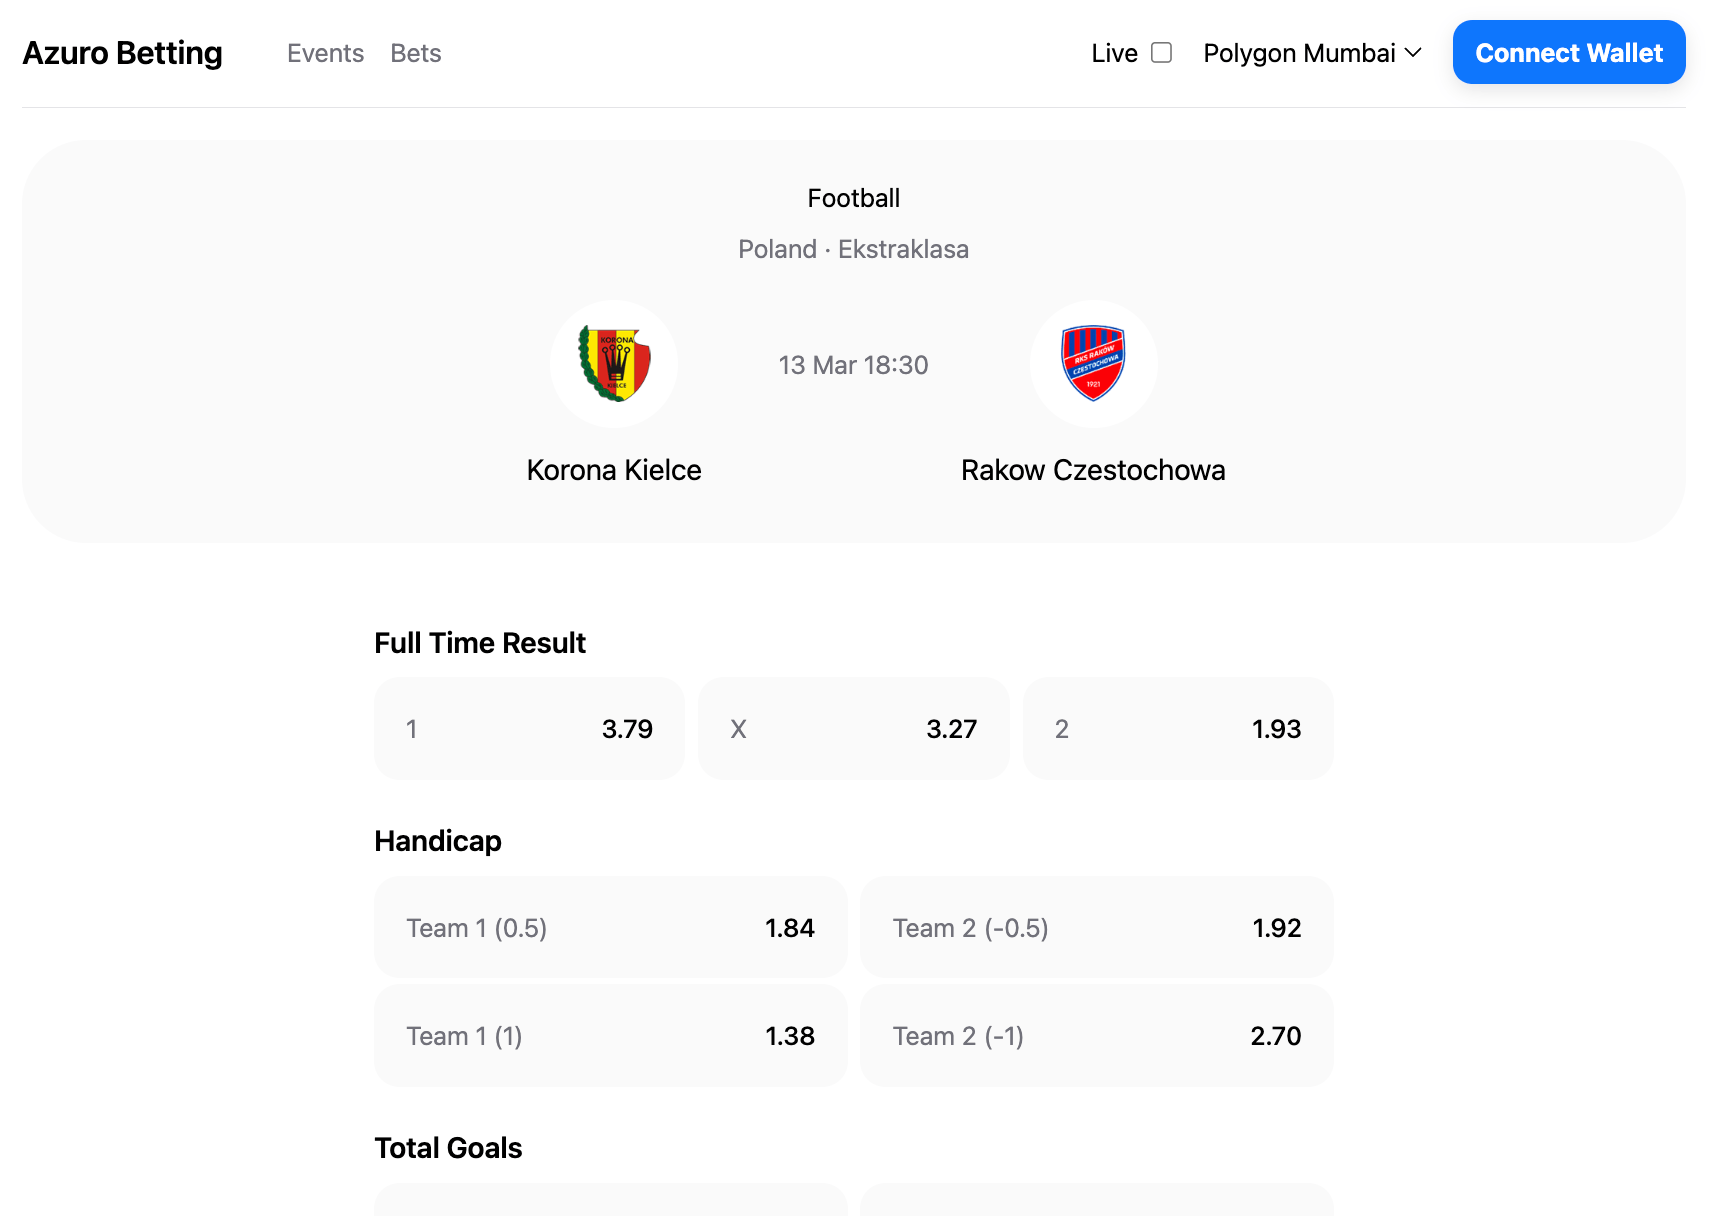
GameInfo
Let's create a component to render game info, we'll use it later.
Create src/components/GameInfo.tsx:
import dayjs from 'dayjs'
import { type GameQuery } from '@azuro-org/sdk'
type ParticipantLogoProps = {
image?: string | null
name: string
}
export function ParticipantLogo(props: ParticipantLogoProps) {
const { image, name } = props
return (
<div className="flex flex-col items-center">
<div className="flex items-center justify-center w-20 h-20 bg-white rounded-full">
{
Boolean(image) && (
<img className="w-12 h-12" src={image!} alt="" />
)
}
</div>
<span className="max-w-[210px] mt-3 text-lg text-center">{name}</span>
</div>
)
}
type Props = {
game: GameQuery['games'][0]
}
export function GameInfo(props: Props) {
const { sport, league, participants, startsAt } = props.game
return (
<div className="flex flex-col items-center pt-6 pb-8 bg-zinc-50 rounded-[40px]">
<div className="flex flex-col items-center text-md">
<div>{sport.name}</div>
<div className="mt-2 text-zinc-500">
{league.country.name} · {league.name}
</div>
</div>
<div className="mt-5 grid grid-cols-[1fr_auto_1fr]">
<ParticipantLogo {...participants[0]} />
<div className="mx-5 pt-7 text-md text-zinc-500">
{dayjs(+startsAt * 1000).format('DD MMM HH:mm')}
</div>
<ParticipantLogo {...participants[1]} />
</div>
</div>
)
}GameMarkets
This component will render all the markets for selected game. It uses previously created OutcomeButton.
Each market has a description, which can be used, for example, in tooltips. In this example we will just render them to show that it exists.
Create src/components/GameMarkets.tsx:
'use client'
import type { GameMarkets, MarketOutcome } from '@azuro-org/sdk'
import { OutcomeButton } from '@/components'


type GameMarketsProps = {
  markets: GameMarkets
}

export function GameMarkets(props: GameMarketsProps) {
  const { markets } = props

  return (
    <div className="max-w-[600px] mx-auto mt-12 space-y-6">
      {
        markets.map(({ name, description, outcomeRows }) => (
          <div key={name} className="">
            <div className="mb-2 text-lg font-semibold">{name}</div>
            <div className="space-y-1">
              {
                outcomeRows.map((outcomes, index) => (
                  <div key={index} className="flex justify-between">
                    <div className="flex gap-2 w-full">
                      {
                        outcomes.map((outcome) => (
                          <OutcomeButton
                            key={outcome.selectionName}
                            outcome={outcome}
                          />
                        ))
                      }
                    </div>
                  </div>
                ))
              }
            </div>
          </div>
        ))
      }
    </div>
  )
}As always, don't forget to add all components export to src/components/index.ts.
Render game details
After creating helping components, let's use them together and render game details page.
Create folders for the page (src/app/event/[id]) and create page.tsx inside.
Here we'll use 2 hooks from Azuro SDK.
useGame- to fetch game data.useGameStatus- to keep track of game status.useGameMarkets- to fetch game markets and conditions. "Conditions" represents the data from the smart contracts with the same name. Each contract contains a set of outcomes, and there is no direct relationship between outcomes and markets in conditions. But it's mapped under the hood of SDK. If you are interested, you can check out the code (opens in a new tab) of helpers.
'use client'
import { useParams } from 'next/navigation'
import { useGame, useGameMarkets, type GameQuery, useGameStatus, GameStatus } from '@azuro-org/sdk'
import { GameInfo, GameMarkets } from '@/components'


type MarketsProps = {
  gameId: string
  gameStatus: GameStatus
}

const Markets: React.FC<MarketsProps> = ({ gameId, gameStatus }) => {
  const { loading, markets } = useGameMarkets({
    gameId,
    gameStatus,
  })

  if (loading) {
    return <div>Loading...</div>
  }

  if (!markets) {
    return null
  }

  return <GameMarkets markets={markets} />
}

type ContentProps = {
  game: GameQuery['games'][0]
  isGameInLive: boolean
}

const Content: React.FC<ContentProps> = ({ game, isGameInLive }) => {
  const { status: gameStatus } = useGameStatus({
    startsAt: +game.startsAt,
    graphStatus: game.status,
    isGameExistInLive: isGameInLive,
  })

  return (
    <>
      <GameInfo game={game} />
      <Markets
        gameId={game.gameId}
        gameStatus={gameStatus}
      />
    </>
  )
}

export default function Game() {
  const params = useParams()

  const { loading, game, isGameInLive } = useGame({
    gameId: params.id as string,
  })

  if (loading) {
    return <div>Loading...</div>
  }

  if (!game) {
    return (
      <div>Game info not found</div>
    )
  }

  return (
    <Content game={game} isGameInLive={isGameInLive} />
  )
}
Great job! Now we can click on game cards on events page and see the result:
Now we're ready to place first bet.
Learn more
In our tutorial we're building simple betting app. If you're ready to go deeper, learn things from SDK that we used in this section: